Showing posts with label stitching. Show all posts

Monday, June 5, 2017

Flutter by, Butterfly

The landscape is finally in full bloom here in New Hampshire, and just the other day, I saw my first butterfly of the season.  To celebrate, I thought I'd share a sweet little project that I stitched up over the weekend.


This quick little project fits into a 5" x 7" frame and couldn't be easier!  I made the little butterfly by fusing two pieces of fabric together.  After cutting it out, I stitched it onto the background using a few long straight stitches that do double duty as the butterfly's body.  I did the rest of the stitching using two strands of embroidery floss—using a backstitch for the lettering and flower stems, lazy daisies for the flower petals and leaves, and French Knots for the flower centers.

You can find the pattern for Flutter by, Butterfly here.  Before beginning, make sure that the box of the printed pattern measures 5'' x 7''.  Using a water soluble marking pen, transfer the pattern to a 7'' x 9'' rectangle of background fabric and layer with a 7'' x 9'' piece of batting before stitching.  This step gives a bit of dimension to your stitching and prevents the floss ends from showing through.

After stitching your project, remove the contents of a 5'' x 7'' frame, wrap both layers of the project around the glass, pop it back into the frame and voilà!


By the way, I'm always on the lookout for great frames and I actually found this beauty at Kohl's.  The frame cost only $5 on sale, it comes in several great colors and best of all, it's deep enough to accommodate the extra layers of fabric and batting without having to tape the back.  I bought two and I'll probably go back for more!


Before I go, I just wanted to let you know that I'm hard at work on a big project that I hope to be able to share with you soon.  In order to be able to focus on the project, I've decided to take a month off from blogging.  In the meantime, I wish you all happy quilting and I'll see you back here in July!

Jen

Monday, March 13, 2017

Bloom Where You Are Planted

We're supposed to have a snowstorm here in New Hampshire tomorrow, and with a potential accumulation of 14-18 inches of snow, I can't think of a better time for a little spring stitching!!


These wooden buttons were the inspiration for this sweet project:


I saw them online when I was ordering some homespun fabric from Jubilee Fabric (jubileefabric.com) and I couldn't resist.  They're tiny—only 3/8"—but perfect for scattering across a background.


Back to the project!  First off, you can find the pattern for this little stitchery here.  The finished project measures about 5" square, but start with a larger background square (8" or so) so you can comfortably use an embroidery hoop.  You can trim the background square later if you like.

After tracing the pattern onto the background square using a light box and a water-soluble marking pen, I used size 8 perle cotton and a wrapped backstitch to stitch the "Bloom" and the big flower stem.  For the rest of the lettering and the little flower stems, I used two strands of embroidery floss and a backstitch—lazy daisies for the little flower leaves.  I appliquéd the felted wool flower and leaves using a single strand of embroidery floss and a whipstitch.  And finally, I used six strands of floss to stitch down the little buttons, making an "x" pattern in their centers.

I went back and forth about how to finish this project.  I thought about making it a little quilt with a loop that could be hung on a door knob or hook, kind of like this project that I made last November :

Give Thanks Mini Quilt

I also thought about adding a patchwork border and finishing it as a small pillow, but ultimately I decided to frame it.  To do so, I layered it with a thin piece of batting (flannel would also work), wrapped it around the glass that came with the frame, and inserted it into the frame.  Fast and finished!!


Happy Stitching!!

Thursday, August 27, 2015

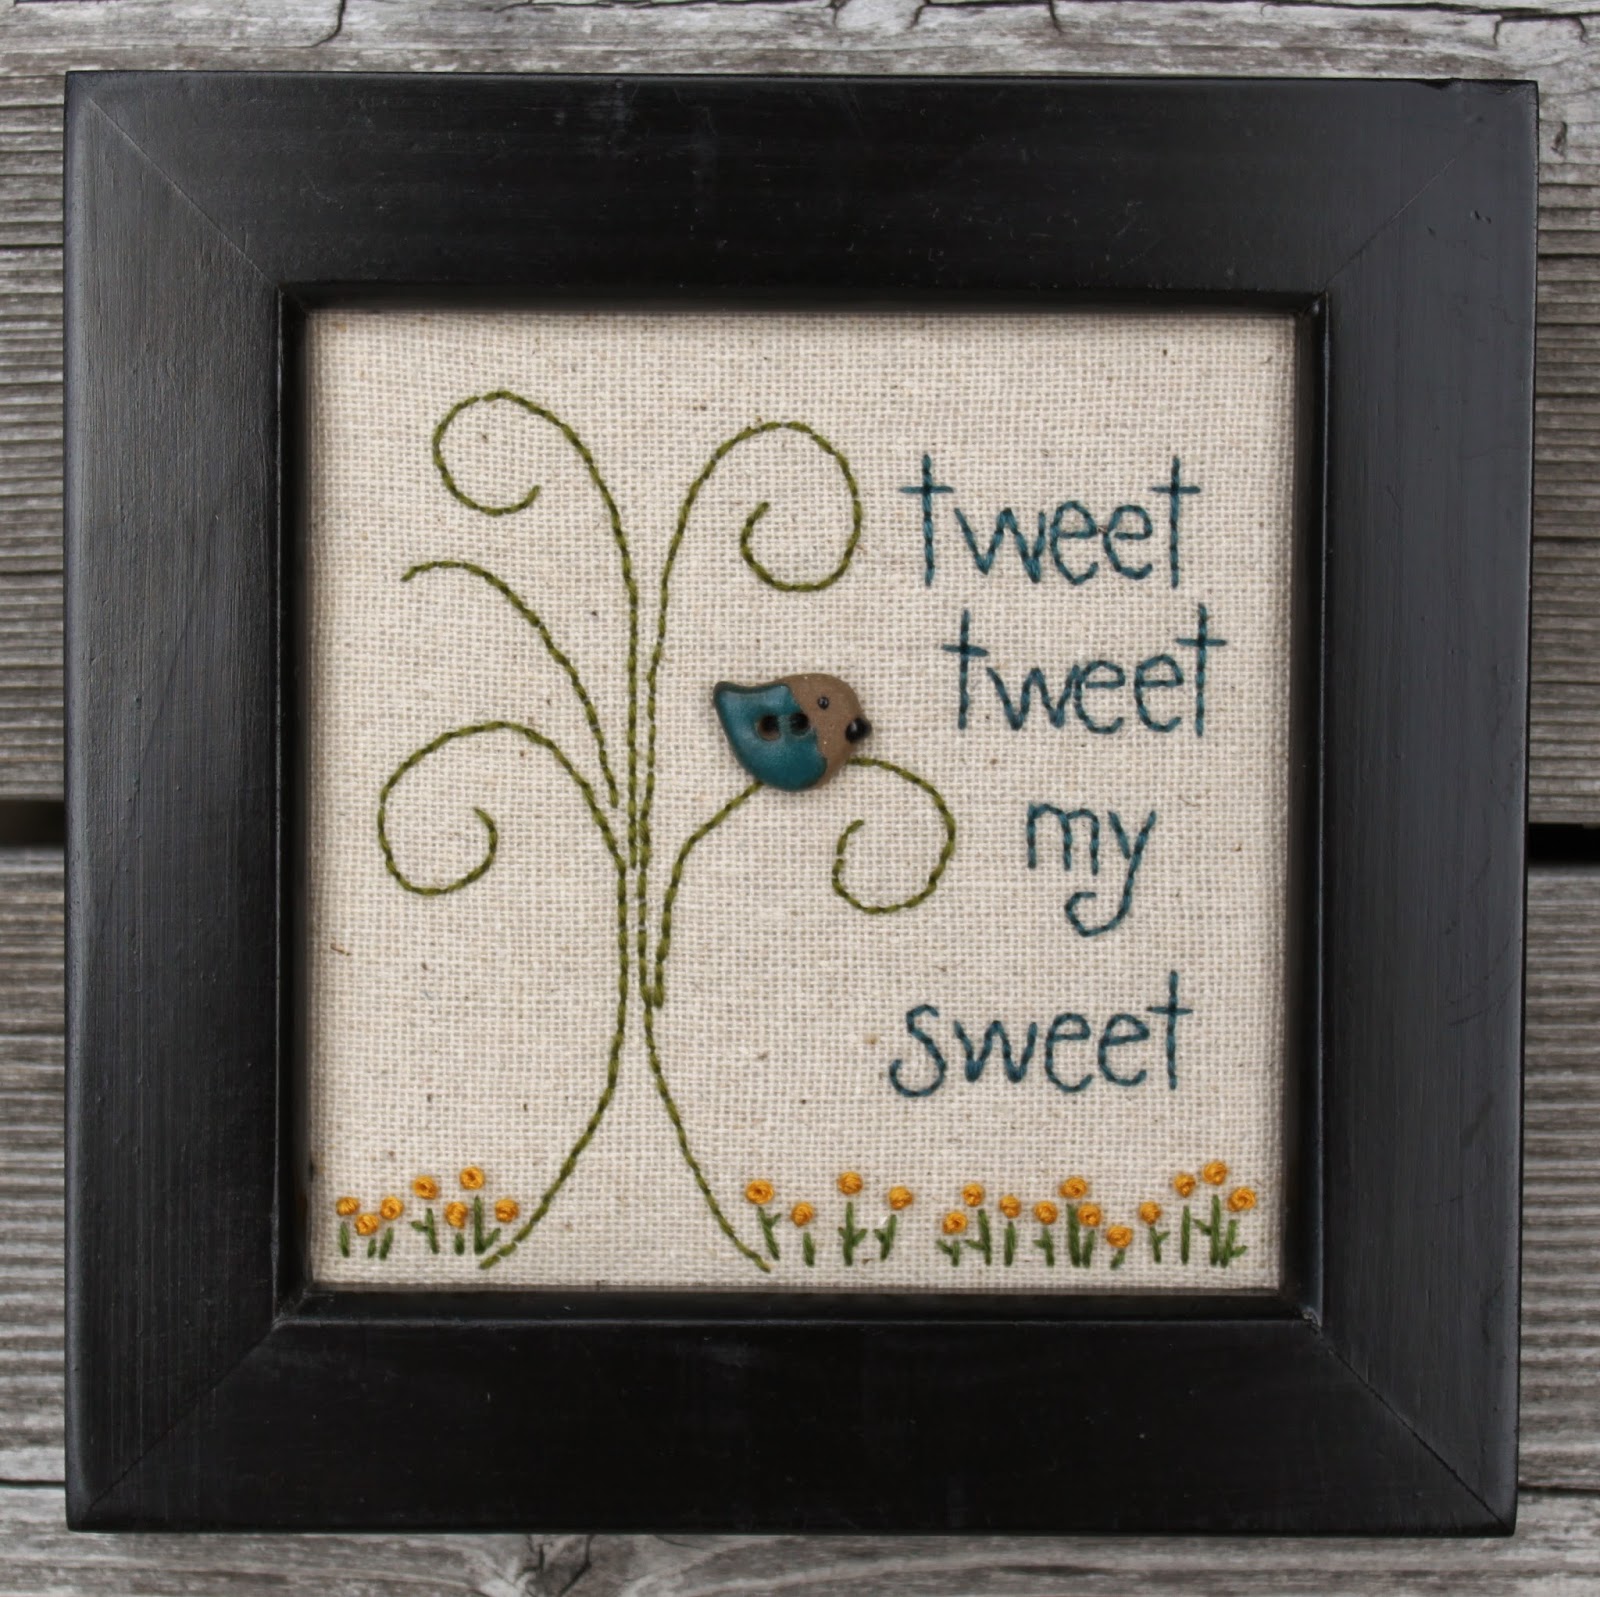
Tweet, Tweet, my Sweet - Free Pattern

So apparently I only post once a month in the summer!  Sadly I've had very little time to blog lately.  Maybe it's because I've been spending every waking moment in the car.  OK, not every moment, but this past month I've driven to Boston three times, to NYC, to Toronto, and to a teeny town in northern Vermont.  I've waited in the car for hours while my boys did a skating clinic at a rink 1½ hours from home and I've spent the last two weeks carpooling for two-a-day soccer practices.

I don't mind the actual driving, but the waiting was becoming brutal.  I mean how much time can you actually spend on your phone?!  My solution—stitching!  Embroidery is fast, easy, portable, and good for your blood pressure.  I don't have the scientific data to back this statement up, but it definitely works for me.

Here's my latest project:


All you need is a 6" x 6" piece of background fabric, blue, green, and yellow floss, and a little bird button.  After tracing the design onto the background fabric using a disappearing ink pen and a light box, I used spray basting adhesive to baste the woven background fabric to a 6" x 6" piece of white flannel.  You don't have to do this step, but the flannel prevents the floss ends from showing through the background fabric and it doesn't add much bulk—great if you plan to frame your work.

I used two strands of floss for all of the stitching and a backstitch for the tree and lettering.  The yellow flowers are made with french knots and their stems and leaves are made using a long straight stitch.

I chose to frame my little project because I made it as a gift for my amazing sister-in-law, Leisa, but I think it would also be cute made into a little pillow with a floral border.  If you decide to frame yours, you'll need a square frame with a 4" x 4" (or slightly smaller) opening.

Here's the pattern:


When you print/copy this template, the outer square should measure approximately 5" x 5".  The background fabric dimensions that I gave you are slightly larger to allow for squaring up, framing, etc. so just center the pattern on your fabric square.

Hope you have fun stitching this sweet little project!  Your heart will thank you!