
I don't mind the actual driving, but the waiting was becoming brutal. I mean how much time can you actually spend on your phone?! My solution—stitching! Embroidery is fast, easy, portable, and good for your blood pressure. I don't have the scientific data to back this statement up, but it definitely works for me.
Here's my latest project:
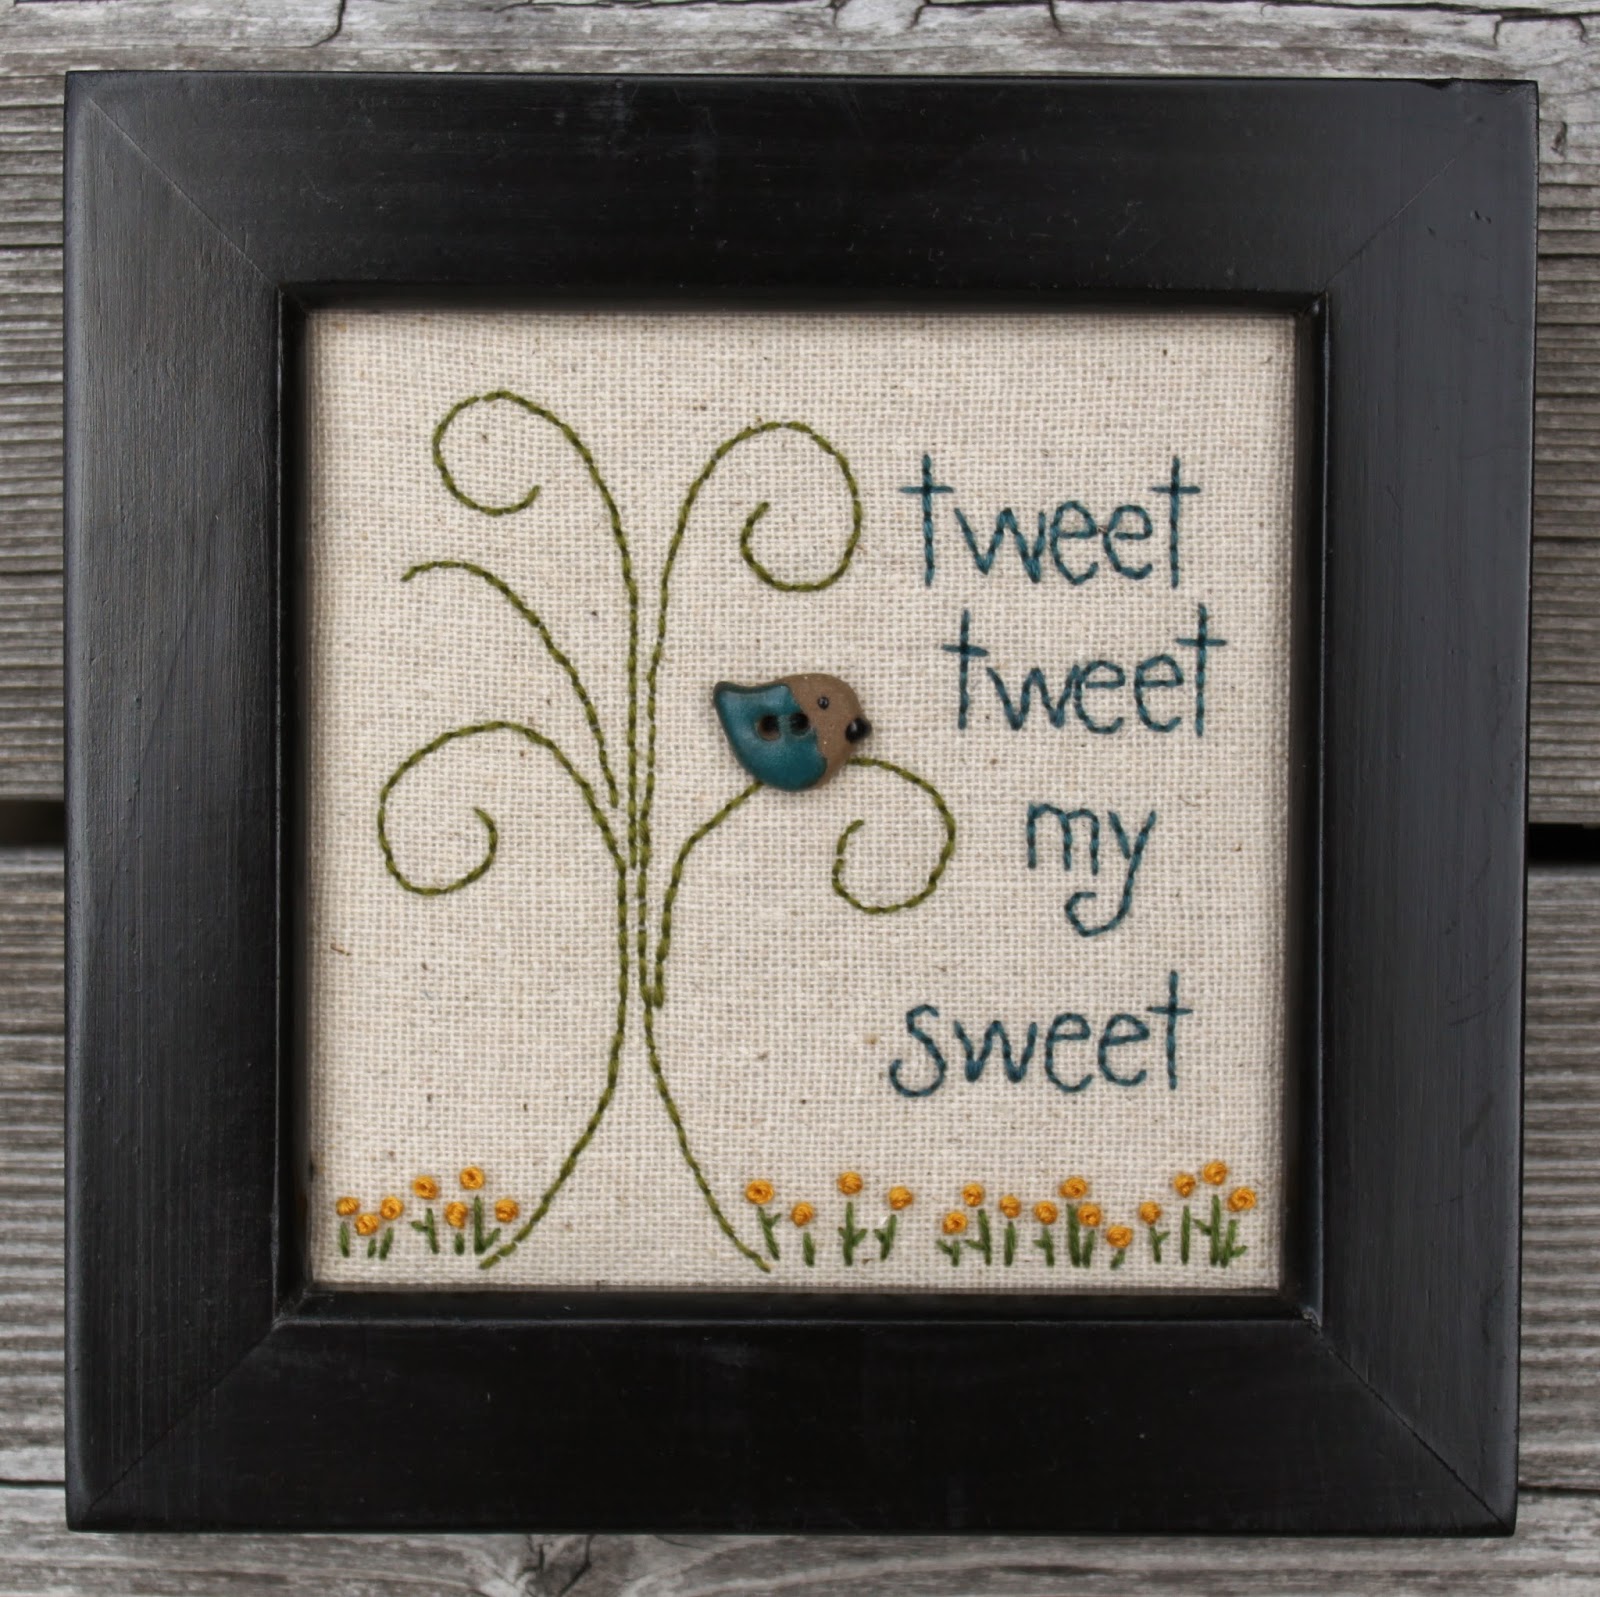
All you need is a 6" x 6" piece of background fabric, blue, green, and yellow floss, and a little bird button. After tracing the design onto the background fabric using a disappearing ink pen and a light box, I used spray basting adhesive to baste the woven background fabric to a 6" x 6" piece of white flannel. You don't have to do this step, but the flannel prevents the floss ends from showing through the background fabric and it doesn't add much bulk—great if you plan to frame your work.
I used two strands of floss for all of the stitching and a backstitch for the tree and lettering. The yellow flowers are made with french knots and their stems and leaves are made using a long straight stitch.
I chose to frame my little project because I made it as a gift for my amazing sister-in-law, Leisa, but I think it would also be cute made into a little pillow with a floral border. If you decide to frame yours, you'll need a square frame with a 4" x 4" (or slightly smaller) opening.
Here's the pattern:

When you print/copy this template, the outer square should measure approximately 5" x 5". The background fabric dimensions that I gave you are slightly larger to allow for squaring up, framing, etc. so just center the pattern on your fabric square.
Hope you have fun stitching this sweet little project! Your heart will thank you!