Friday, December 23, 2016

Merry and Bright - Day 12!

❄❄❄Update:  The complete pattern for Merry and Bright is now available for download on my Etsy shop.  The pattern includes material requirements, cutting chart, step-by-step instructions, full color diagrams, paper piecing foundation patterns and embroidery templates to help you on your way.  Click here to view the pattern.❄❄❄


Welcome back for the final day of the Merry and Bright Quilt-along!

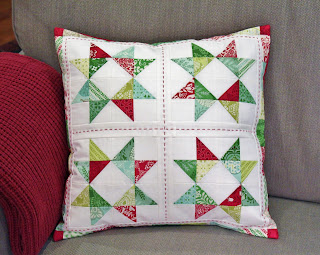
Today we're going to talk about finishing touches and, drum roll please, here's a look at my finished Merry and Bright quilt!


I have to be honest—I adore this quilt!  The color palette is so cheery and I love the combination of the simple, graphic blocks and the sweet, pretty embroidery.  This one is definitely one of my faves!


On to the finishing:

Basting Backing Fabric to Quilt Top/Batting Sandwich:

The next step in the process is to layer your quilt top/batting sandwich with a backing fabric panel measuring at least 34" x 40".  Once again, I chose to use spray basting adhesive to baste the backing fabric to my quilt sandwich.  I smoothed the backing fabric out on a flat surface with the wrong side up and used masking tape to hold it taut.  Then I lightly sprayed the surface with the basting spray, placed the quilt top/batting sandwich on top of it with the batting side down, and smoothed it out, starting in the center and working outwards.  Then I pulled up the tape, flipped all three layers of the quilt sandwich over, and made sure it was nice and smooth on the back side.

If you'd like to use a different method of basting your quilt, please feel free to do so!  One way or the other, it's time to baste the backing to the back of your quilt sandwich.


Quilting Inner Border:

I quilted my inner background fabric border using two colors of embroidery floss and a big running stitch.  This method matches the look of the embroidery that we used on the sashing strips, but it is actually quilting because we're stitching through all three layers now.  This helps to hold the layers of the quilt together and because it's a running stitch, it looks just fine on the back of your quilt.

After placing my quilt sandwich in a quilting hoop (basically a big embroidery hoop), I used two strands of floss and the same needle that I used for all of my embroidery to do the big stitch quilting.  I stitched ¼" inside the background fabric inner border seams.  You can mark your lines prior to stitching if you like, but I could actually see the shadow of my seam allowances through the background fabric and just ran my stitching along those lines.  Easy peasy!

Your stitches should measure between ⅛" and ¼", but really the stitch length matters less than keeping them consistent.  And finally, as in regular quilting, bury your knots between the layers of your quilt.


Final Touches:

The last thing I did before binding my quilt, was to machine quilt in the ditch on either side of the 4 embroidered sashing strips with a walking foot and white thread to match my background fabric.  This quilting doesn't really show up much, but I added it to help hold the layers of the quilt together.  Then I decided that because my quilt was sufficiently stabilized and charmingly embellished, it was (finally!!) time to bind!

If you'd like to further quilt or embellish your quilt, please do so!  My mom is thinking of adding a star button to the top of one or more of her Christmas trees and for a while contemplated decorating the trees with additional embroidery (if you choose to add more embroidery, make sure you do it before you layer the backing onto your quilt).  You could also use quilting to add texture to the trees, the ornaments or even the house roofs.  The options are many and an opportunity for you to further personalize your quilt. Or maybe, like me, you'll step back and think "that'll do!"


So that wraps up my 2016 Merry and Bright Quilt-along!  (please excuse the little Christmas pun, but I've been waiting all month to write that!!)  I have truly enjoyed sharing this project with you all and I've especially loved connecting with you via email, Facebook and Instagram!  What a treat to be able to see your progress and to know that we were actually quilting along together!

I'd love to see pictures of your quilts when they're finished!  You can email them to me at jendalyquilts@gmail.com or please tag me @jendalyquilts when you post your pics on Instagram or Facebook.


In the meantime, thank you all so much for following along with this year's quilt-along!  Happy Holidays and may all your days be Merry and Bright!

Cheers!  Jen

Thursday, December 1, 2016

Merry and Bright - Day 1

❄❄❄Update:  The complete pattern for Merry and Bright is now available for download on my Etsy shop.  The pattern includes material requirements, cutting chart, step-by-step instructions, full color diagrams, paper piecing foundation patterns and embroidery templates to help you on your way.  Click here to view the pattern.❄❄❄


Welcome to Day 1 of the 2016 Christmas Quilt-along!  Da datta da!! (imagine a trumpet fanfare at this point!)

This year we'll be making a 28" x 34" wall hanging.  Every other day between now and December 23rd, I'll be unveiling a new component or embellishment for our quilts.  We'll start off with traditional piecing, move into some paper piecing, and wrap up with simple embroidery.


This is the color palette that I chose for my quilt—I'm trying for a happy, Christmas candy kind of look—but feel free to choose whatever color palette appeals to you.  Hint:  you'll probably want to have at least a couple of green prints to work with.  

Monday, November 28, 2016

2016 Christmas Quilt-along Coming Up!

I've finally emerged from my pie-induced coma and, as promised, it's time to get ready for my 2016 Christmas Quilt-along!

I'm calling it a "Quilt-along" this year, rather than a mystery quilt, because we'll actually be assembling the quilt top by the middle of the month and spending the last week before Christmas embellishing it with embroidery.  We'll be using both traditional and paper piecing again this year, and the embroidery will be very simple—perfect for the confident beginner to intermediate quilter!  I can't wait to get started!

Here's what you'll need for this year's quilt:

    
  • 6 Fat Quarters - 3 green prints and 3 red prints (I'm actually substituting a pink FQ for one of the reds because I'm going for a Christmas candy kind of look)
  • 1 6" x 6" square gray print (mine looks like a solid, but it's actually got a subtle print)
  • 1 yard background fabric (mine is the white/pink micro dot.  All of the embroidery we'll be doing is on the background fabric, so you'll want to choose a background fabric that the embroidery will show up against—nothing too busy, think subtle print—and if you can't find a print you like, a solid white will work just fine!!)
  • 1 yard backing fabric
  • ⅓ yard binding fabric
  • 34" x 40" piece batting
  • embroidery floss to match your fat quarters (mine are (from top to bottom) DMC's 817, 666, 3832, 937, 470 and 166).
It will also be helpful to have a washout marking pen, embroidery hoop and needles, and basting spray.

I mentioned above that I'm trying to use Christmas candy colors in my quilt.  Earlier in the fall, I wrote a post about my Holiday Games quilt and included some ideas for different colorways.  The red/pink/green version really caught my eye and it's the inspiration for this year's quilt.


The Quilt-along will start this Thursday, December 1st.  I'll be posting every other day throughout December and we'll finish up on December 23rd, just in time for Christmas! So exciting!!


And now before I let you go, I'd like to share some amazing photos of last year's mystery quilt, all made by readers of this blog.

This one was made by Jill and I love how she kicked it up a notch by adding the yellow piping:


Here's a beauty made by Maureen from Canada.  I had to include Maureen's home country because my husband is also Canadian!  Yay Canada!


And finally, here's my mom's version!  I love the quilted cross-hatch that she used in the inner border—it adds dimension and it's a great substitute for the big stitch quilting that I used in the original.


Thank you Jill, Maureen and Mom for sending me photos of your gorgeous quilts!


The free pattern/tutorial for last year's mystery quilt is still available on my blog, if you'd like to make your own little quilt.


In the meantime, I'll see you back here on Thursday!!

Saturday, November 19, 2016

Give Thanks - Free Pattern

I've had the idea for this Thanksgiving project circling around in my head for a while and finally had a few hours this morning to knock it out.


It's my Give Thanks mini quilt— a quick little project and the perfect reminder to pause for a moment to ...well... give thanks!


To make your own little quilt, you'll need:

1—7" x 7" square of background fabric
1—7" x 7" square of backing fabric
1—1¼" x 30" strip of fabric for single fold binding
1— 7" x 7" square of batting
embroidery floss (shown in 729 (gold), 400 (rust), and 898 (brown))
13" length of jute, ribbon, rope—whatever you'd like to hang your quilt with

1.  You can find a pdf of the embroidery pattern here.  To make your project as shown, the box around the pattern should measure 5¾" square.  If you'd like to make your quilt bigger, feel free to enlarge the pattern—just remember to adjust the size of your fabric squares accordingly.

2.  Using a washout marking pen, trace the embroidery pattern onto your 7" background fabric square.

3.  Layer the marked 7" background fabric square with the 7" square of batting, insert into an embroidery hoop (I used a 4" hoop), turn on a holiday movie, and settle in for a bit of embroidery. Use two strands of floss and a backstitch for the lettering and wheat stalks.  Stitch the tops of the wheat using two strands of floss and lazy daisies.

4.  When you're finished embroidering, wash out your marked lines.  I use a spray bottle for small projects like this.  I spritz the marked lines, then blot off most of the water with a clean tea cloth, and let the quilt top dry flat on my ironing board.

5.  When you're satisfied that the marked lines are gone, press your work.  Then thread a needle with a short length of embroidery floss or perle cotton (I used green perle cotton).  Insert the needle on one side of the wheat stalks and then bring it up through your work on the opposite side of the wheat.  Tie the two ends of floss or perle cotton into a little bow and trim the ends.

6.  Layer your embroidered background fabric/batting unit with your 7" backing fabric square (I basted my layers together using spray basting adhesive), and trim all layers to desired size.  Again, my finished quilt is 5¾" square.  Bind.

7.  Finally, tie a knot at either end of the 13" length of jute (or ribbon, rope, etc.).  Stitch the knots to the back of your quilt to make a hanging loop.  And that's it!

Hang your little quilt on a door knob, from a hook, or wherever you like.


Or wouldn't it be great to give as a hostess gift on its own or wrapped around the neck of a bottle of wine or a bouquet of flowers?!  Yes please!!

Hope you have fun with this little project and I hope you all have a Happy Thanksgiving!

(p.s. Check back here after Thanksgiving for news about my upcoming 2nd Annual Holiday Mystery Quilt! Can't wait!)

Sunday, November 6, 2016

Candy Stars - Free Mini Charm Pack Pattern

Last week I was hard at work on my latest Moda Bake Shop tutorial, and this mini charm pack of gorgeous "Desert Bloom" fabric by Sherri and Chelsi of a Quilting Life...


...became this sweet little mini quilt!


I named it "Candy Stars" not only because it's made with a Moda Candy, but also because the colorful, sparkly half square triangles in the star blocks make me think of candy.

Candy Stars is fast, fun and easy, and it finishes at 16" square, the perfect size for a pillow!

Here's Candy Stars finished as a Christmas pillow and made with Kate Spain's beautiful "North Woods" fabric:


I made this little pillow exactly like the mini quilt, but substituted a white center square for the navy blue that I used in the "Desert Bloom" version.  I also used red perle cotton to embroider an oversized running stitch down the center of the sashing strips and the inner border.  This fun pillow has a totally different vibe than the original mini quilt, but it's just as sweet!

If you'd like to make your own version of Candy Stars, grab a mini charm pack and head over to the Moda Bake Shop for my free tutorial—you'll find complete instructions and lots of picture to help you on your way.

Happy Quilting!

Tuesday, October 18, 2016

Holiday Games

So excited because I just received my copy of the latest issue of McCall's Quick Quilts!  


I've been waiting for this one, because it features my one of my favorite little Christmas quilts, Holiday Games.


Holiday Games is a truly fast and fun quilt that you can make with scraps of red and green fabrics from your stash.  In my quilt, I even mixed in some flannels and wovens, and I think they really contributed to the warm, homespun feel.  For fun, I also topped four of the trees with a wooden star button and instead of quilting the checkerboard center, I used perle cotton to stitch small crosses where the squares intersect—what a time saver!  I was definitely playing when I made this quilt, and I love the end result!


Just in case traditional or primitive isn't your thing, I've included a couple of EQ7 sketches of what this quilt might look like in a more modern color palette.

Here's a red, green and pink version that makes me think of candy. Yum...


And in this version, I've substituted turquoise for the pink.  Less candy-ish, but equally fun!


The December/January 2017 issue of McCall's Quick Quilts will be available on newsstands by October 25th.  You can also purchase a print or digital issue now at the Quilt and Sew Shop.

Happy Quilting!


Tuesday, September 27, 2016

Orange Blossoms - Free Pattern

I know it's officially fall, but I just finished this sweet little quilt today and I thought it would be fun to share the pattern — sort of a last hurrah of summer.


I'm calling this little quilt "Orange Blossoms" for obvious reasons, and I have to say that I'm in love with the orange and cream color palette.  Kind of makes me think of a Creamsicle.  So pretty and so happy!  I especially love the orange homespun that I used for the borders and binding.  I found it over the summer at a fabric store that was going out of business and I bought the end of the bolt because I couldn't help myself — had a bit of a thing for orange this summer, in case you can't tell!

Back to the quilt.  It measures 16" x 16", and while I made mine with orange prints, I think it would be equally charming in salmon pink, or turquoise, or in any color for that matter.  I used raw edge machine appliqué for the fabric blossoms, so this quilt is a quickie, especially if you forgo the hand quilting.


If you'd like to make your own version of Orange Blossoms, you'll need:

1 Fat Quarter cream background fabric:  cut into 9–5" x 5" squares
5 Assorted orange prints, at least 4" x 4" square of each
¼ yard orange print for borders and binding:  cut 2 borders– 1¾" x 13½"; 2 borders–1¾" x 16½"; and 2 strips 2¼" x WOF (WOF = Width of Fabric cut selvage to selvage) for binding
18" x 18" piece batting
18" x 18" panel backing fabric
lightweight fusible web
orange and yellow embroidery floss

Make the fabric blossoms:

1.  You can find a copy of the flower pattern here.  You'll need to print a copy to use both as a template for cutting out the fabric flower petals and as an embroidery pattern.

2.  Prepare your flower petal appliqués using one of the following methods:

  Template method (this method allows you to fussy cut if so desired):
  • Create a flower petal template by tracing a petal shape onto template plastic and cutting it out along the drawn line.  Trace the petal onto the paper side of lightweight fusible web 25 times, making sure to leave at least ¼" between shapes.  Following manufacturer's directions, fuse 5 petal shapes to the wrong side of each of 5 assorted orange prints.  Note:  when you cut around the petal shapes before fusing them to the fabric, be sure to leave the drawn lines intact.
  Non-template method:
  • From lightweight fusible web, cut out 5–4" x 4" squares.  Trace the flower shape onto the paper side of the fusible web squares.  Following manufacturer's directions, fuse each marked 4" x 4" fusible web square to the wrong side of each of 5 assorted orange prints.  
3.  Cut petals out through all layers along the lines drawn on the paper side of the fusible web.  Remove paper from each shape.

4.  Using the flower pattern as a guide, fuse petal shapes to right side of 5 cream background 5" x 5" squares.  Note:  you can spin the flower however you like, but make sure that the distance from flower petal to cream background edge is even on all four sides.

5.  Using matching or complementary thread, machine stitch the flower petals to the cream background squares, stopping and starting at the center of the flower and keeping your stitching close to the edge of the flower petals.

6.  Knot threads in the back of your work.


Assemble quilt:

1.  Referring to the picture of the quilt, lay out 5 fabric blossom squares and 4 cream background 5" x 5" squares in three rows of three squares each.

2.  Stitch squares together in rows and rows together to make quilt center.  Press seams open.

3.  Stitch 1–1¾" x 13½" border to either side of quilt center, pressing seams towards borders.

4.  Stitch 1–1¾" x 16½" border to top and bottom of quilt center, pressing seams towards borders.


Embroider quilt:

1.  Using a water soluble marking pen, trace a flower shape on each of the 4 blank cream background squares.

2.  Using spray basting adhesive, baste quilt top to 18" x 18" piece of batting with right side up.  Embroidering through the batting adds a bit of dimension to your stitching and prevents the embroidery floss ends from showing through on the front of your work.

3.  Embroider flowers using 2 strands of orange embroidery floss and a backstitch.

4.  Stitch a group of French knots in the center of each flower using 3 strands of yellow embroidery floss.

5.  Referring to the quilt, and using 2 strands of yellow embroidery floss, stitch a Lazy Daisy at the 4 junctions where the horizontal and vertical seam lines intersect.

6.  Using 3 strands of embroidery floss, stitch a single French knot at the center of each Lazy Daisy created in step 5.


Finish quilt:

1.  Layer embroidered quilt top/batting with backing panel and baste or pin.

2.  Quilt as desired.  I chose to hand quilt around each flower, but this is such a small quilt that you don't really have to quilt if you don't want to.  The Lazy Daisies that you embroidered will help to keep your batting from shifting.

3.  Bind and enjoy!


Thursday, September 15, 2016

More Christmas in September

It might be a bit too early to start thinking about Christmas in the rest of the world, but in the quilting world, the time is now!  We've got 3½ months to gather ideas, shop for fabrics, and make quilted projects to decorate our homes and to give as gifts.  Plenty of time!!

And I've got a great place for you to start!  Quilters Newsletter's latest special issue, Best Christmas Quilts 2016, is available in print or for download now at the Quilt and Sew Shop and wherever quilting magazines are sold.  It's a beautiful issue, with 26 projects of all shapes and sizes to help you celebrate the Christmas season.


I've got a couple of fast and fun projects in Best Christmas Quilts 2016.

On page 58, you'll find my Mittens oraments.  


These darling little mittens are easy and so much fun to make, and the best part is that you can stuff them with treats just like a stocking!  Use them to decorate your Christmas tree, string them up as a garland, or tie them to a gift.


Each mitten takes only a fat eighth of fabric plus a small scrap for the mitten's cuff, so you can easily make them with fabric from your stash.  And you can use your imagination for the hanging loop—try cords or ribbons in white or other colors, or even metallics.  Careful though, these mittens are addictive!

My second project is found on page 60 of Best Christmas Quilts 2016.  It's a 12" x 20" pillow called Sweater Weather that was inspired by Nordic sweaters and perfectly named by my daughter.


I love the monochromatic color palette of this blue on blue version of my pillow, but I think it would look beautiful in burgundy, red and ivory:


Or maybe traditional red and green:


Or a more modern red and green:


Or even blue and gray:


And if solids aren't your thing, this pillow would also look great in batiks or prints—the possibilities are endless!

Happy quilting!

Thursday, September 8, 2016

Good Cheer

Boys back in school — check.
Daughter safely delivered to college — check.
Mourning period over — hmmmm.....

Ok, two out of three is going to have to be good enough because it's time to get back to work!

Today I'm a guest blogger at the McCall's Quilting/Quick Quilts blog.  Head on over to find out how this:


inspired this:


It's my Good Cheer table runner and it's featured in the October/November 2016 issue of McCall's Quick Quilts, currently available at the Quilt and Sew Shop or wherever quilting magazines are sold.


Happy quilting!

Sunday, August 21, 2016

Quilting with T-shirts

Happy and relieved today because yesterday I taught my first quilting class at the Upper Valley Food Co-op's Sew-op and it was great!  Phew! 

The class was called "Quilting with T-shirts" and the idea was to learn tips and techniques for quilting with t-shirts (just call me "Captain Obvious"), while making a pillow.  Here's a look at the sample:


During the class, we learned how to evaluate t-shirts, plan pieced block designs, prep and stabilize t-shirts, and cut them up and sew them back together.


We worked on piecing blocks, not only to learn how to work with the t-shirt material, but also because you can't always count on uniformity in t-shirt or logo size when making a t-shirt quilt.  Inevitably, you'll have to frame logos or fill in with fabric to make blocks the same size.


And sometimes, you'll want to include smaller logos, messages, team names, etc. within a single block,  Knowing how to piece t-shirt quilt blocks gives you unlimited flexibility and design opportunities.


And if you fall in love with the look and feel of stabilized t-shirt material like I did, you may even want to forgo the logos occasionally in favor of t-shirt patchwork...


This was such a fun class to teach because beyond a few basic techniques, there really are no rules.  All of my students got to try their hand at design and their results were as unique and full of personality as the women themselves!

Here's Jess, Sam, Esther, and Jerri holding up samples of their work:


Thank you, ladies, for making my first experience teaching quilting one I'll never forget!

Jen

Thursday, July 14, 2016

Ready for Fall??

So I walked out to the mailbox today, opened it up to find this waiting for me...


...and did a happy dance right there in the street that probably scared away the wildlife and definitely shocked my neighbors.  "Why?" You may ask.  Well, the latest issue of Primitive Quilts and Projects has arrived—certainly reason enough for a happy dance—and this one is special.  See that table runner on the cover??  It's mine!!  Woo-hoo!!

I'm thrilled not only because I LOVE Primitive Quilts and Projects magazine, and to have one of my quilts on the cover is such an honor, but also because the photo of my quilt is just so beautiful! 


So let me give you the details.  The quilt is my Cozy Cabins table runner and you can find the complete pattern on page 12 of the Fall 2016 issue of Primitive Quilts and Projects—available now both online through the PQP website and wherever quilting magazines are sold.  I made Cozy Cabins with homespun, woven, and brushed flannel fabrics from my stash and embellished the outer border with wool appliqué leaves and acorns.  Here's a closer look:


Kind of makes you want to pull on a sweater and curl up with a mug of hot apple cider and a good book, doesn't it?  Seriously though, it's way too hot out there for a sweater and hot cider!  But it's not too soon to start a fall project!  Happy quilting!

Tuesday, July 5, 2016

Happy!! - Free Mini Charm Pack Pattern

I can't believe it's already July!  To celebrate summer, I've got a new project to share with you—it's my Happy!! table runner, and it's a featured recipe today at the Moda Bake Shop.


This little quilt is so easy and so much fun to make.  I made the square in a square blocks in the center of the quilt with a bit of white background fabric and two mini charm packs of "Brighten Up!" fabric by Me and My Sister Designs—gorgeous fabrics that remind me, for some reason, of rainbow sherbet!


But what really makes this quilt sing, and what made me happy enough to name the quilt Happy!!, is the cheerful embroidered flowers.


I used two strands of floss and a backstitch to embroider the flowers and I loved watching each one emerge.  In fact, I enjoyed making Happy!! so much, that I made it twice.  Here's my second version made with April Rosenthal's "Meadowbloom" fabric—this one makes me think of sunshine.


Happy!! is a great take along project—perfect for summer.  I've been carrying my quilt and floss around with me and embroidering whenever I have a few minutes of downtime.  I stitched the "Meadowbloom" version of the quilt while sitting on a grassy patch overlooking the Connecticut River during my son's crew practices.  Bliss!

The free tutorial for Happy!! is available at the Moda Bake Shop.  My tutorial includes instructions for making the square in a square blocks two ways—paper pieced and traditionally pieced.  I've also included a quick how-to for the backstitch, so you should find everything you need all in one place.

Happy!! Quilting!