Showing posts with label free pattern. Show all posts

Friday, December 21, 2018

Deck the Halls QAL - Day 9

Update:  The complete pattern for Deck the Halls is now available for download in my Etsy shop.  The pattern includes material requirements, step-by-step instructions and full color diagrams to help you on your way.  Click here to view the pattern.

Welcome back for Day 9 of the Deck the Halls QAL!


For our final day we're going to be adding a ribbon border to our medallion quilts using the split quarter square triangles blocks that we made on Day 6.  I love how this surprisingly easy border frames and finishes the quilt—definitely worth the trimming we did last week!

...

I've loved making a medallion quilt for the QAL this year!  It was so much fun to see the quilt unfold with the addition of each border.  All that's left now is to decide whether to hang my Deck the Halls quilt on my wall:


or to display it on my kitchen table:


Hmmm....

And that's a wrap for the 2018 Deck the Halls Quilt Along!  It's been an absolute pleasure sharing this project with you and connecting with you via email and social media.  I'd love to see pictures of your quilts when they're finished, so please tag me @jendalyquilts when you post your quilts or even send a photo to me at jendalyquilts@gmail.com.

If you weren't able to quilt along with us this year, but you'd like to make your own Deck the Halls quilt, the QAL posts will be available on my blog through the month of January.  The complete (and compressed) pattern for Deck the Halls will also be available in my Etsy shop in the new year.

Thank you all so much for following and quilting along!  I wish you all Happy Holidays, a Happy New Year, and Happy Quilting!!

Cheers!  jen


Wednesday, December 19, 2018

Deck the Halls QAL - Day 8

Welcome back for Day 8 of the Deck the Halls QAL!♬♫♪


Today we're adding an Hourglass border to our medallion centers, and the extra time we spent carefully pressing the seam allowances on our Hourglass blocks on Day 3 is going to pay off big time!


Monday, December 17, 2018

Deck the Halls QAL - Day 7

Welcome back for Day 7 of the Deck the Halls QAL!  ♪♫  Today we're moving on to assembly!!!

Here's where we're headed...


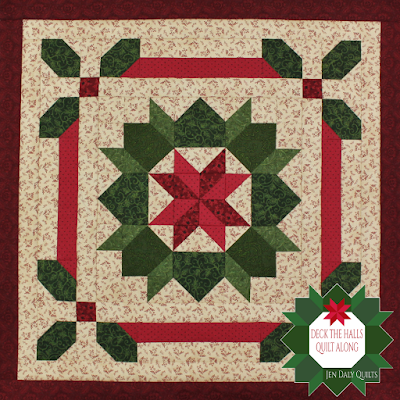
This year we're making a medallion quilt!  And what a center medallion it is—wouldn't it be beautiful on its own as a mini quilt or even a pillow?!

Friday, December 14, 2018

Deck the Halls QAL - Day 6

Welcome back to the Deck the Halls QAL! ♫♪  It's Day 6 already and our last day of piecing blocks!


Today we'll be making Half Square Triangles and Split Quarter Square Triangles, which means marking and trimming, BUT because it's Friday we have an extra day to finish the blocks.  Funny how that worked out!  :)


Wednesday, December 12, 2018

Deck the Halls QAL - Day 5

Welcome back for Day 5 of the Deck the Halls QAL!  ♪♫


Today is the mid-way point in the QAL—I can't believe how quickly time passes in December!  As promised we'll be making Mystery Block B and a familiar friend, a Pinwheel block.


Monday, December 10, 2018

Deck the Halls QAL - Day 4

Welcome back for Day 4 of the Deck the Halls QAL!!  ♫♪


Today's block looks kind of like an aloe plant or a succulent—more abstract greenery— but we're going to call it a "mystery" block.  And because it's the first of two mystery blocks, we'll call this one Mystery Block A.


Friday, December 7, 2018

Deck the Halls QAL - Day 3

Happy Friday and welcome back for Day 3 of the Deck the Halls QAL!  ♪♫


Today we'll be making Hourglass blocks!  Easy right?!  But even if you're familiar with how to make Hourglass blocks, be sure to read through the tutorial once because we'll be changing up the seam allowance pressing a bit to suit our purposes.


Wednesday, December 5, 2018

Deck the Halls QAL - Day 2

Welcome back for Day 2 of the Deck the Halls QAL! ♪♫


After a big day of cutting on Monday, we're going to start with some easy piecing today.  We'll use stitch-and-flip corners to make little holly leaf blocks.  Ok, they may look like diagonal lines right now, but they'll make sense later.   Try to think of them as abstract holly leaves—very artsy!

Monday, December 3, 2018

Deck the Halls QAL - Day 1

Update:  The complete pattern for Deck the Halls is now available for download in my Etsy shop.  The pattern includes material requirements, step-by-step instructions and full color diagrams to help you on your way.  Click here to view the pattern.

𝅘𝅥𝅘𝅥𝅮 Deck the halls with boughs of holly! 𝅘𝅥𝅮𝅘𝅥𝅰 Fa la la la la la la la la 𝅘𝅥𝅮𝅘𝅥𝅯𝅘𝅥

𝅘𝅥𝅘𝅥𝅮 Tis the season... for the the Deck the Halls Quilt Along!


This year's quilt along is inspired by the garlands and greenery, holly and berries, wreaths and ribbons that we use to decorate our homes for the festive season.  And because I'm thinking of hearth and home, this year I'm using rich cranberry reds and forest greens to give my quilt a warm, cozy look.

Once again, here's a list of the materials that you'll need for this year's quilt along:
  • ⅞ yard background fabric
  • ⅞ yard dark red/burgundy print for piecing and binding*
  • 2 fat quarters red prints—one should be a medium red print and the other a lighter/brighter red
  • 3 fat quarters green prints—one dark, one medium-dark, and one medium
  • 1⅛ yard fabric for backing
  • 40" x 40" piece of batting
*If you'd like to use a contrasting fabric for your binding, you'll need only ⅝ yard of the dark red/burgundy print and ⅓ yard binding fabric.

I'll be posting every Monday, Wednesday, and Friday between now and Christmas and we'll finish on December 21st.  With each post, I'll reveal a new block or component and we'll assemble the quilt during the last week of the QAL.  Some of the pieces we'll be working with are small, but this project is suitable for most quilters.

Ready?  Set?  Let's get started!


Monday, November 26, 2018

2018 Christmas Quilt Along Coming Soon!

Yay!  It's quilt along time again!  And the theme of this year's quilt along is "Deck the Halls" — I'm thinking garlands and greenery, holly and berries, wreaths and ribbons...  

The quilt along will start on Monday, December 3rd and once again, I'll be posting on Mondays, Wednesdays, and Fridays from the 3rd through the 21st.  The final project is a mystery that will be constructed and revealed in stages throughout the month.  This year we'll be doing fairly simple machine piecing (with some smaller patch sizes) making this quilt along suitable for most quilters, including confident beginners.


Here's what you'll need for this year's quilt along:
  • ⅞ yard background fabric
  • ⅞ yard dark red/burgundy print for piecing and binding*
  • 2 fat quarters red prints—one should be a medium red print and the other a lighter/brighter red print
  • 3 fat quarters green prints—one dark, one medium-dark, and one medium
  • 1⅛ yard fabric for backing
  • 40" x 40" piece of batting
*If you'd like to use a contrasting fabric for your binding, you'll need only ⅝ yard of the dark red/burgundy print and ⅓ yard binding fabric.


I'm going with a more traditional, warmer color palette this year—forest greens and cranberry reds set against a cozy tan background—but if you prefer brighter, more modern colors and prints please use what you love.

If you can't quilt along with us this year, be sure to follow along here or on Instagram or Facebook @JenDalyQuilts.  Hope to see you back here Monday!

Thursday, January 25, 2018

Home Tweet Home Take Two

I've had some questions about how to make a larger version of Home Tweet Home, my latest Moda Bake Shop tutorial, using charm squares (5") rather than mini charm squares (2½").  If you're interested, here's some rough math to help you out.

For a 30½" square quilt made with a charm pack:

Birdhouse block size:  4¾" x 4¾" finished
Sashing strips:  1" x 4¾" finished (cut 1½" x 5¼")
Cornerstones:  1" x 1" finished (cut 1½" x 1½")
Inner border:  1" wide finished (cut 2 - 1½" x 22½" and 2 - 1½" x 24½")
HST border:  3" x 3" HSTs finished (make in the same manner described in the tutorial using 4" squares to start - you'll have to trim the charm squares first)
Outer border corner squares:  3" x 3" finished (cut 3½" x 3½")

I plugged this larger design into EQ7 and it's looks like you'd need roughly a yard of background fabric and ½ yard of fabric for the birdhouse roofs.

Here's a link to a foundation pattern that I drafted for the 4¾" birdhouse block.  And here, again, is the link to the original tutorial — the cutting measurements are different for the larger quilt, but the construction is the same.


I'd love to see what a bigger version of this quilt looks like and I may even try one myself!  One reader suggested appliquéing a black circle to the larger birdhouses rather than using buttons — great idea Cheryl!  Don't forget to tag me @JenDalyQuilts if you share your quilts on Instagram or Facebook!

Happy Quilting!

— Jen

Friday, December 22, 2017

Sweet Shoppe Quilt-Along - Day 10!

❄❄❄Update:  The complete pattern for Sweet Shoppe is now available for download on my Etsy shop.  The pattern includes material requirements, step-by-step instructions, and full color diagrams to help you on your way.  Click here to view the pattern.❄❄❄

Welcome back for the final day of the Sweet Shoppe Quilt-Along!  This quilt-along has been so much fun for me because I've been able to keep the final quilt a secret until today!  So without further ado, here's a look at the finished Sweet Shoppe quilt!


Ta-da!  It's a table runner with colorful candy rows interspersed with strips of sweet stitching.  It's amazing to me how simple shapes and bright colors can combine to create a quilt that's bold and graphic but still very sweet.  Don't you just love quilting?!


Some Thoughts on Finishing Your Sweet Shoppe quilt:

The quilt was pretty before I added the red perle cotton, but I think the red stitching is really the cherry on top!  If you'd like to add the stitching to your quilt, you can also substitute 2 strands of embroidery floss for the perle cotton.  

But don't feel limited to finishing your quilt the way I did—there are countless ways to personalize this project.  You could do decorative machine stitching or a narrow quilted border pattern of wavy or swirly lines or ribbons within the sashing strips.  The larger blocks are an opportunity for some fun machine quilting—I can imagine spirals in the lollipops and maybe a small cross-hatch in the wrapped sweets.  Even the red and green peppermint stick rows could be embellished with complementary colored diagonal lines stitched between the HSTs.  And if you really want to take the Sweet Shoppe theme over the top, you could stitch little bows to the lollipop sticks or the narrow parts of the wrapped sweets and sew tiny buttons to the centers of the minty fresh and peppermint blocks.  Just have fun!


I'd love to see your finished quilts, so please tag me @JenDalyQuilts if you post them on Facebook or Instagram, or send a picture to me via email:  jendalyquilts@gmail.com.  And if you haven't been able to quilt along this year, but you'd like to make your own Sweet Shoppe quilt, the complete pattern will be available in my Etsy shop after Christmas.

Thank you all so much for following along with this year's Sweet Shoppe Quilt-Along!  Happy Holidays and, as ever, Happy Quilting!

Cheers!  Jen

Wednesday, December 20, 2017

Sweet Shoppe Quilt-Along - Day 9

Welcome back for Day 9!  After 8 days of piecing blocks and half-square-triangles (and I think we can all agree that we're experts at making HSTs by now!) we're finally going to start assembling our quilts!


Today we're making rows!  I just loved making a row quilt for last year's quilt-along, so I thought we'd give it another try this year with a different shape and size.


Monday, December 18, 2017

Sweet Shoppe Quilt-Along - Day 8

Happy Monday and welcome back for Day 8 of the Sweet Shoppe Quilt-Along!

Today we're making lollipop blocks!


These blocks couldn't be easier—we'll be strip piecing the lollipop stick units and making snowball units for the lollipop tops.  Fast and fun, so let's get started!

Friday, December 15, 2017

Sweet Shoppe Quilt-Along - Day 7

Welcome back for Day 7 of the Sweet Shoppe Quilt-Along!  Today we're making peppermint blocks!


These blocks are actually just like the minty fresh blocks that we made on Day 5, but they're red and white and spinning in the opposite direction.  We're also making twice as many as we did on Day 5, but because it's the weekend, we've got an extra day to get them done.  Ready?  Here we go!


Wednesday, December 13, 2017

Sweet Shoppe Quilt-Along - Day 6

It's Day 6 of the Sweet Shoppe Quilt-Along and today we're making wrapped sweets!


On day one, I suggested that you label your 2 favorite red fabrics as red print #2 and red print #3 and your favorite green fabric as green print #3.  The wrapped sweet blocks are the biggest in the project, so we'll be using your favorite fabrics (as labeled) to make them today.

Monday, December 11, 2017

Sweet Shoppe Quilt-Along - Day 5

Welcome back for Day 5 of the Sweet Shoppe Quilt-Along!  Hope you all enjoyed your weekend!  With fresh snow on the ground here in New Hampshire and more on the way, my Christmas spirit is definitely on the rise, so let's get started!

Today we'll be making green peppermint blocks.  Or should I say spearmint or wintergreen blocks?  Either way, these blocks are super sweet and minty fresh!  Hmmm... "minty fresh," am I crazy or is that a cute name for this block?!


Friday, December 8, 2017

Sweet Shoppe Quilt-Along - Day 4

Woohoo!  It's Friday and Day 4 of the Quilt-Along!  Today we'll be making half-square-triangle units... only kidding!!  As promised we're moving on to something new—split quarter-square triangles.


These fun little units are so cute when they're combined to make Double Pinwheel blocks, just like the one pictured above.  We're going to be doing something different with our split quarter-square triangles, or "SQST"s, but I'm going to save that reveal for another day!  Now let's get started...


Wednesday, December 6, 2017

Sweet Shoppe Quilt-Along - Day 3

Wow, it's Day 3 already—welcome!!


You may have surmised from the above picture that we're making half-square-triangle units again!  These will be smaller HST units and we'll be making quite a few of them.  We won't be making the star pictured above for this project, but I'm definitely filing the idea away for another time—I love the red and green polka dots together!

Monday, December 4, 2017

Sweet Shoppe Quilt-Along - Day 2

Welcome back for Day 2 of the Sweet Shoppe Quilt-Along!  I hope you all had a good weekend and that your fabrics are cut and ready to go!


Today we'll be making half-square triangle units in both red and green.  The method we'll be using makes 8 half-square-triangle units at a time—some quilters refer to it as the "Magic 8" method.  I like to make the half-square-triangle (or "HST") units a bit bigger than they need to be to start out with and then trim them down to ensure that the HST units are the exact size that I need, so that's the approach we'll be taking today.

Ready to sew?  Here we go!